Posts Tagged student blog

Step 7 – How to Write a Resume

Now that I have my Guard Card, it is time to write my resume and apply for jobs. I have only written one once before so these How to Write a Resume Tips helped to refresh my memory.

10 Tips to Get Your Resume Noticed: How to Write a Good Resume

Resume Example from eduGuard's Security Officer Career Guide ebook

Resume Example from eduGuard’s Security Officer Career Guide ebook

1.       Resumes must be free of errors. Have a person you trust proofread your resume.

2.       Keep it to one page, if possible. Categories should be clearly titled and contain positive, relevant information.

3.       Resumes should only tell the truth.

4.       Use an easy font to read (example: Arial point 12) and keep each section uniform.

5.       Include a phone number you will always have access to. Also, have a professional email listed: johnsmith@gmail.com, not soccarlover@hotmail.com.

6.       If you include Career Highlights/Professional Skills, use a series of bullet points that emphasize your most important career experiences, your skills, personality traits, characteristics and key accomplishments from your work history as they relate to the job for which you are applying.

7.       For each former employer clearly indicate the company name, your position, and dates of employment.

8.       Education: state names of schools/programs, dates of attendance, majors/minors, degrees and/or certificates.

9.       List awards and other recognition (e.g. team leader)

10.   List volunteering/team participation if applicable. This tells a lot about who you are as a person if your past employment is sparse.

References are usually at the bottom of the resume. Select a few people who have known you at least two years and can provide positive job-related information. Be sure to first ask their permission and tell them about the job you are applying for so they know how they could help you get this job. Include the following for each reference:

1.       Full name

2.       Occupational title

3.       Place and address of employment

4.       Daytime telephone number (with area code)

Want more advise, I also found this list of resume mistakes helpful.


Next Blog – How to Have a Great Interview


Posted in: Blog, Student Blog

Leave a Comment (0) →

Step 6 – Where Should I Look for a Security Guard Job in California?

While I am waiting for BSIS to clear me and issue a Guard Card, I thought it would be useful to figure out where I should be applying. Here is some of the advice I received on where to look for a job as a Security Guard/Security Officer:BusinessSecurity

1. Look for websites with a PPO number on them. PPO stands for Private Patrol Operator and according to the BSIS website they mean “operates a business that protects persons or property or prevents theft.” So that means businesses hire them to do their security. You could look over many different businesses during your shift.
Example: First Alarm Security, and Bay Area Patrol

2. Job Search Engines – These are websites that help everyone find a job, just type in Security Guard or Security Officer and your location to help start the search in your area. You might even be able to apply for that job online!
Examples: Monster.com, career builder, indeed.com

3. LinkedIn – It’s having an online resume and you can network with the people that might hire you. Say you are seeking employment. See if the companies you are interested in working for are on LinkedIn and see if they are hiring. Can’t hurt to ask!
4. Remember if you have a Guard Card, you can get hired as a PSO. PSO’s are hired by one company for security – malls, parks (like Disneyland), one company, one store, one building, etc.  Your guard card is a level above the PSO training and registration.

Next Step – How to Get Your Resume ready to send to Potential Employers.

PS: Be sure to look at the job requirements. Some jobs may only need a valid Guard Card with the initial 8 Hour training, others might want your entire 40 Hours of training done before applying.

Posted in: Blog, Student Blog

Leave a Comment (0) →

Step 5: How to Get a Live Scan

How to Get a Live Scan?  Now that I have finished the Powers to Arrest and Weapons of Mass Destruction courses and received the certificates for them, I can apply to get my Guard Card by filling out some paperwork and getting my Live Scan done. This is what I did to get my Live Scan.  I got the steps from the “How to Get a CA Guard Card” found on eduGuard’s website.how to get a live scan

1.       There are two ways to fill out the Security Guard Application:

a) Print out and mail in this application but it will take a lot longer than filling out the application online using the BreEZe.

b) Apply online using the BSIS BreEZe and it should only take a few days to get your cleared status for guard card so you cna go to work!

*If you are going to Register to Become a PSO, please use this link for your correct links to forms.

2.       Fill out three copies of the Live Scan Form for Security Guards and go to your nearest Live Scan Site. Need that location? Check here.

3.       Bring a photo ID and money or a debit card to pay the processing and application fees for BSIS, DOJ, and FBI.

4.       Mail in the copy of the Live Scan form and if you already haven’t sent the application, send them together.

Here is a video of the Live Scan Process that I liked.

*This LiveScan is located at 5150 Fair Oaks Blvd #101, Carmichael CA, inside the UPS Store.

Once your DOJ and FBI background checks have cleared and your application has been accepted BSIS will post your cleared security guard status online here at the “BSIS website“. You can then print your cleared security guard status and present it to your prospective employer for employment. Note: You do not need your actual guard card in hand to apply for employment, the print out is fine. After the cleared status you will receive your actual guard card in the mail in approximately 10 to 15 days.

Hope this helped to clear up any confusion there can be on the Live Scan Process. Time to get ready to find a job!

Posted in: Blog, Student Blog

Leave a Comment (0) →

Step 3: Purchase my Guard Card Package

I have to say I am getting excited to start my security training. I’m also really glad my training is online so I don’t have to go anywhere while I study. In my last blog  I decided to purchase eduGuard’s Package C: the full 40 hours because of the $ savings I will get by purchasing all 40 hours at once. Plus with their current promotion, I couldn’t not buy now.

Here is how to purchase eduGuard’s packages:

1.       If you didn’t purchase as your registered, Click Log In and log in using the log in created for you by Registering (Step 2).

2.       Choose your Package from left column. You can look into the details of the package to the right of the lettered column.

eduGuard's Purchase Page. Register and then click Purchase Now!

eduGuard’s Purchase Page. Register and then click Purchase Now!

3.       Basic credit/debit card section

4.       Confirmation page means you are done! Get to training!

Once you have purchased, everybody is required to take eduGuard’s Prerequisite Course before starting any course. I have already taken it. It shows you how to use the program, where to find things on your dashBOARD, etc. I now feel ready to take my Guard Card Courses.


Step 4: Guard Card Courses – 8 hours

Posted in: Blog, Student Blog

Leave a Comment (0) →
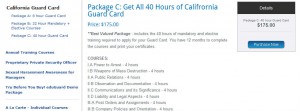
Step 2: Register To Get Your Guard Card (Choosing your eduGuard package)

Joel here and I have decided to get my California Guard Card.  I need 40 hours of security training certificates.  I see eduGuard’s different course packages provide some options to get the training and certificates I need so I can get my Guard Card.  All packages are good for one year after I purchase so I have lots of time to get this training done.  Before I register, I need to select a course package.  I want the one that fits my budget best.

  • I can purchase package A, $49, which has the courses for the initial 8 hours of courses required to apply for my Guard Card.  Once I get my guard card I can be hired which is awesome but wow, I see I will need more training within 30 days after getting hired.
  • Package B, $79, has the courses for the Mandatory 16 hours of training and all the Electives to choose from for the required final 16 hours of Electives. Buying package A and then B would fulfill the 40 hours of required initial training.

This looks like a pretty cool way to go.

  1. I wouldn’t have to spend all the money at one time.
  2. If I don’t have a job lined up right away, I can purchase A now and purchase B after I am making some money.

Hey but wait, I can save $ with Package C – 40 Hours at $99.  I can get all required 40 hours, and have access for one full year to over 80 hours of courses that I can take any time I want.  This will give me time to find a job while I study.  That’s a big enough savings that I will choose Package C.


Posted in: Blog, Student Blog

Leave a Comment (2) →